Getting Started
This guide takes you from installation to your first submitted week. The whole process takes about 10 minutes.
Prerequisites
- A Jira Cloud instance (Aevon is a Forge app and runs only on Jira Cloud)
- Jira administrator access (for installation and time-tracking setup)
Step 1: Install from the Marketplace
- Open the Atlassian Marketplace and search for "Aevon Timesheets"
- Click Get it now and select your Jira instance
- Review the permissions and click Install
Aevon installs as a global app. After installation you'll find it in the Jira navigation under Apps → Aevon Timesheets, and an Aevon Timesheets panel appears on every Jira issue.
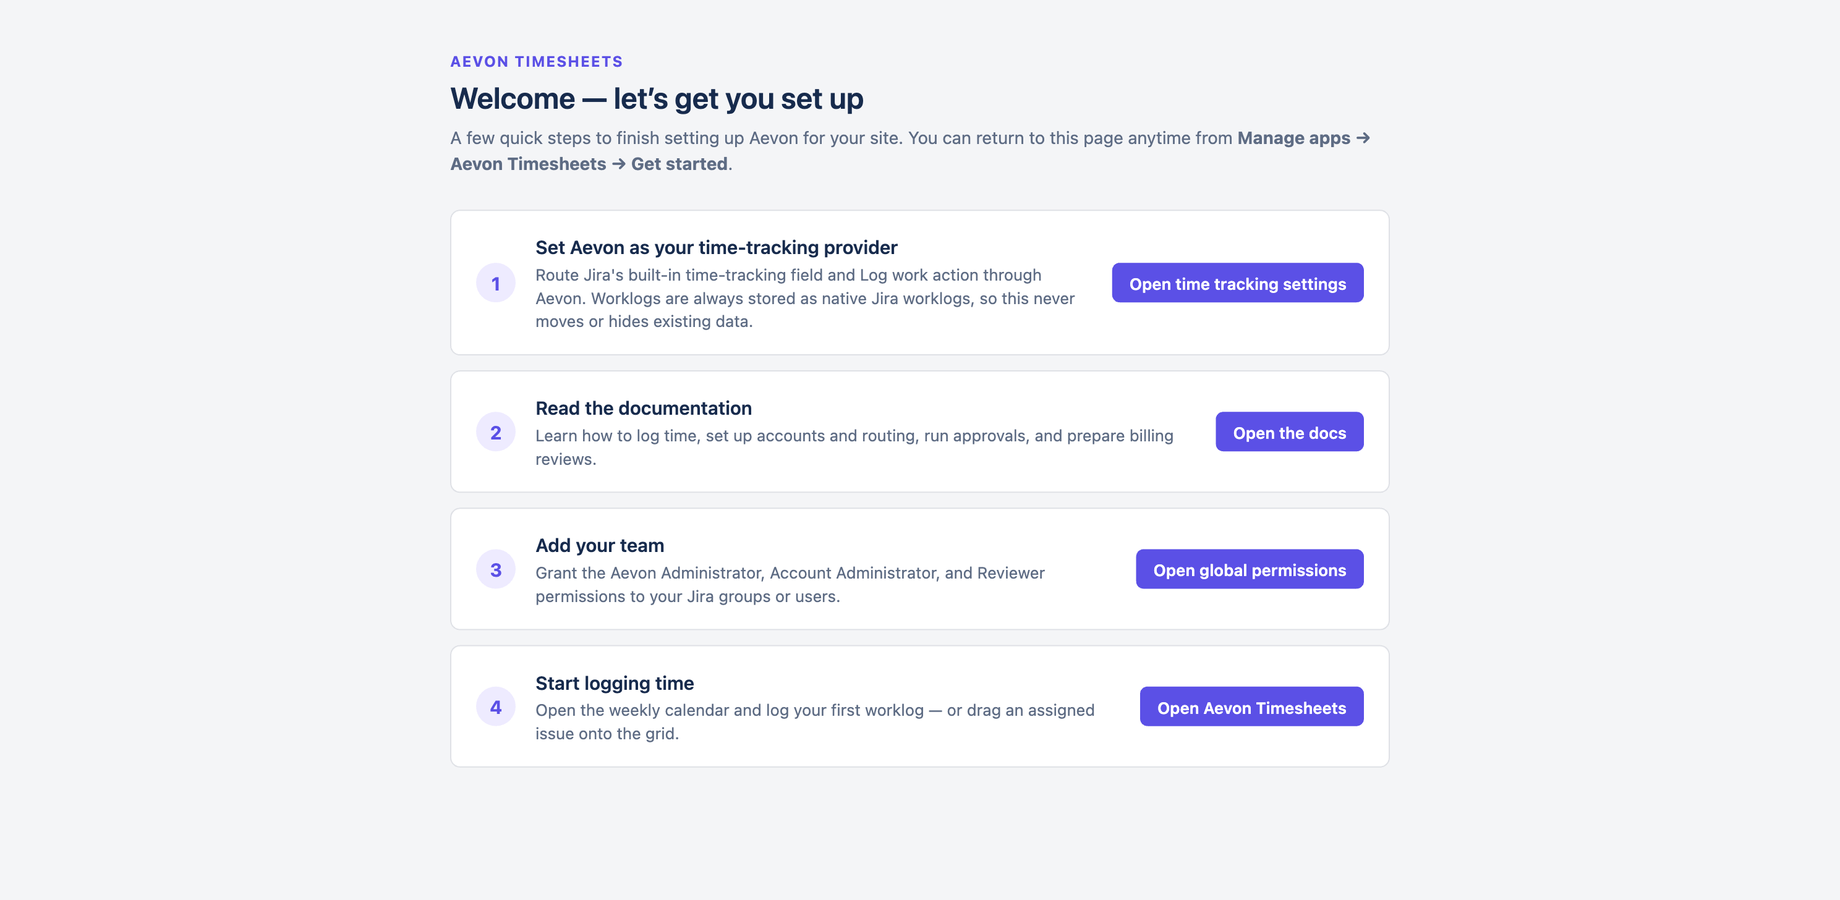
Jira admins also get a Get started hub at Manage apps → Aevon Timesheets → Get started — a one-page checklist with one-click buttons for the steps below (set the time-tracking provider, read the docs, add your team, start logging time). You can return to it anytime.
Step 2: First launch
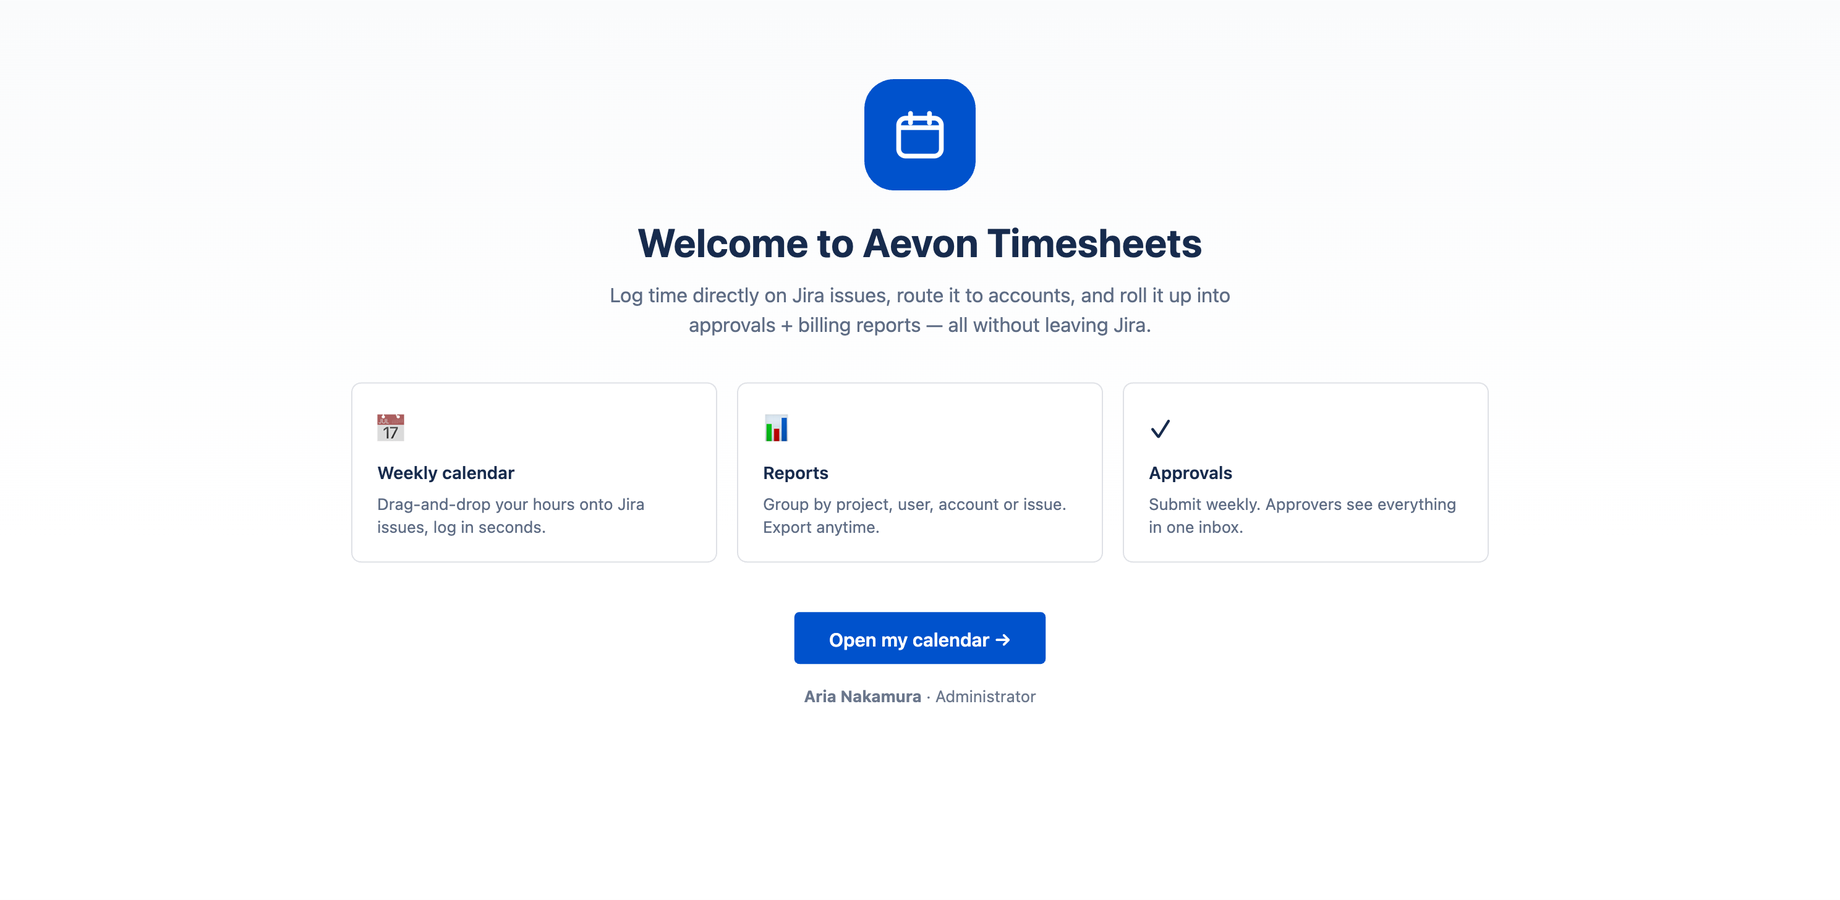
On first launch, Aevon shows a welcome screen with quick links into the calendar, reports, and approvals.
As the person who installed Aevon, you're a Jira site administrator — which always means full Aevon access. Site admins can never be locked out, so you can head straight to Settings to configure the app.
Step 3: Set Aevon as your time tracking provider
Aevon registers itself as a Jira time tracking provider. Selecting it routes Jira's built-in time-tracking surfaces — the time-tracking field and Log work action on each issue — through Aevon. Your worklogs are always stored as native Jira worklogs, so this only changes which engine Jira's native UI uses; it never moves or hides existing data.
- In Jira, open Settings (⚙) → Issues
- Under FEATURES in the left sidebar, select Time tracking
- Make sure time tracking is on
- In the Time tracking provider dropdown, choose Aevon Timesheets
- (Optional) Set the working hours per day, days per week, and default time format
- Click Save
For the full reference on these settings, see Atlassian's Configure time tracking guide.
Step 4: Grant roles to your team
Jira site administrators are always Aevon administrators, so you don't need to grant yourself anything. All Aevon roles are managed in Jira → System → Global permissions:
- Go to Settings (⚙) → System → Global permissions
- Find Aevon Administrator, Aevon Account Administrator, or Aevon Reviewer
- Add the Jira group that should hold the role, then click Add
All three roles default to the jira-administrators group, so your Jira admins already have them. See Permissions for the full role model.
Step 5: Create an account (optional)
Accounts are cost centres that let you route hours for billing. You can skip this and log time straight away, but if you bill or do chargeback, set them up now:
- Go to Accounts
- Click + Add account, give it a name, pick a category (Billable, Capitalized, Operational, or Internal), and choose a default approver
- (Optional) Under Account routing, set a default account per project so worklogs are routed automatically
See Accounts and Account routing for details.
Step 6: Log your first worklog
- Open Aevon Timesheets from the Jira navigation — you'll land on the weekly calendar
- Click Log Activity (or click any empty slot on the grid)
- Pick an issue, set the date, start time, and duration, add a description, and click Log work
Your worklog appears as a card on the calendar. You can drag it to a different time, resize it to change the duration, or click it to edit. See The weekly calendar and Log Work dialog.
Start a timer from the Work Items sidebar, drag an assigned issue onto the grid, or log directly from the issue panel on any Jira issue.
Step 7: Submit your first week
When your week is complete:
- Click Submit week in the calendar header
- Review the approval groups — Aevon splits the week by account (or by project when no account is set) and routes each group to an approver
- (Optional) Click Change on any group to pick a different approver
- Click Submit
The week moves to Submitted. Your approver sees it in their Approvals inbox, and you can track each approver's decision — or recall the week — from Approvals → My submissions.
What's next
- Core Concepts — understand worklogs, periods, accounts, and routing
- Time Tracking — every way to log and rearrange time
- Approvals — the full submit, approve, and recall flow
- Administration — configure rules, attributes, and permissions
If you want per-issue account overrides, a project admin must add the Account custom field to that project's issue screens. See Account custom field.